Wednesday, February 24, 2016

This Piece is Over-Quilted!


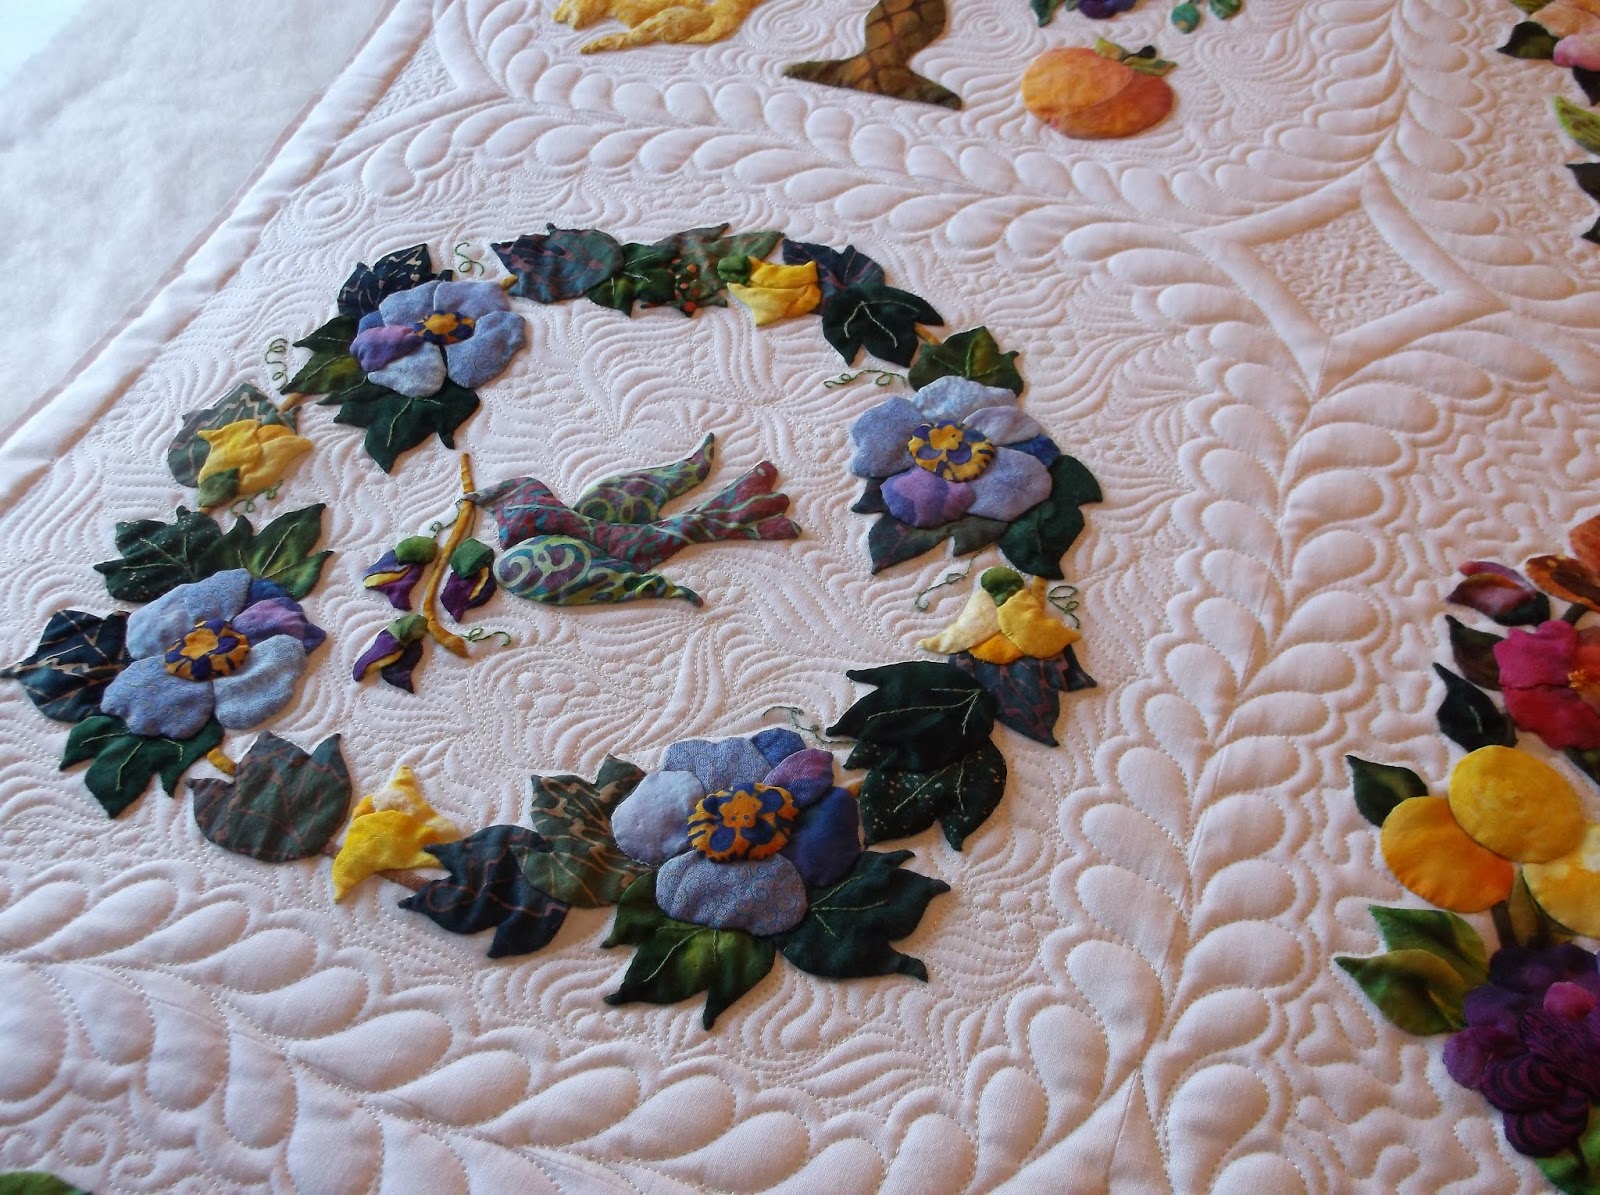
But, that's alright because the piece is mine, and after all, I planned it that way. But, seriously, on this piece there are so many different motifs and styles of quilting designs:

Straight line quilting, stitch-in-the-ditch, curved crosshatching, feathers, ferns, stars, free-motion Baptist Fans, ribbon candy, outline quilting, echo quilting, long loops, and even a Zentangle© design called Rick's Paradox. Frankly, it took longer to find the designs, and figure out where to put them than it did to actually quilt them.


Stitch in the Ditch finished

I usually hold myself back to three motifs (with slight variations to fit into the spaces) on any one piece. Continuity is key here to keeping down the chaos.


Background motifs in

But, on this I wanted to go all the way. Kind of like the pieces I see shared in other blogs and in the big quilt shows. Over the top, quilted to death pieces...I am sure you've seen them.


Put a fork in it - it's done!

But, is this even a good idea? To go all the way, quilt to the “endth” degree, get as complex as you possibly can? Just to show you can? Certainly, that is what quilt show judges are looking for...Just how talented are you? How much time do you have to devote to the quilting of a piece?


Of course, when you are quilting for customers, their vision for their piece and your vision can be wildly different. And, their budget will certainly come into play. Karen McTavish once told a class I was attending: “You will never make a living quilting whole cloth quilts for customers because no one will ever pay you what that level of work is worth.” Same holds true for the 'quilted to death' project.


My quilt “Tangled Up in Blue” was in the American Quilters Society show in Phoenix this month. My category was won by a quilt with 27,000 Swarovsky crystals on it. First of all, that's a LOT of money in crystals. But, I wonder...was it really necessary?


Even cool on the back. Two layers of wool batt...has a mind of it's own before blocking!

Yes, I make pieces for competition in quilt shows. And, yes, I have had customers tell me they want a blue ribbon in the next show, so “do what you need to do to make that happen.” But, how much farther will quilting have to go to win in the next big shows? What's the future hold?


Wednesday, February 10, 2016

Stuffing Appliques

I'd like to show you how to give a little dimension to appliques using cutouts of wool batting. The first picture shows the paper patterns that I traced from the quilt top. I pinned them to two layers of wool batt and cut them out.


I use quilt basting spray to lightly spray the bears. Reaching just under the quilt top, I pat them in place between the top and the regular batting layer. Then smooth the top back in place.

The next picture shows that I have outlined the Momma Bear, and not yet the Baby Bear.


And, now with the background filled in with a loose meander, the bears have a nice puff. Papa Bear resides at the bottom edge of the quilt.


I used this same technique to stuff birds, fish and flowers. Best to do this with simple shapes without a lot of detail. Cute, huh?

Made in America

I've been away from this blog for waaaaay tooooo long! But, let's see what I've been up to.

This is a Made in America embroidery designed by Claudia Dinnell. My customer spent a whole lot of time creating it. I think she used the term “nightmare.”

I've never been handed a piece like this and I was lost at how to start. It's all embroidery. So, after searching around, I found a couple of pictures of other copies of this design that gave me an idea of how to quilt it. It started with stitching on top of the major design lines with invisible thread. Here's a picture of Lady Liberty, before and after outlining.


Oh, and I have wanted to try quilting with two layers of batting and thought this piece would really benefit because of the open areas that would not get quilted. This is two layers of wool batt.


After the outlining, I switched to a matching color thread and worked on the border and then the background fill. I designed the border to match her fused stars and swirled a little wind around them. The fill is a free motion Baptist Fan. I switched thread color again to work in the sashing with a curl/echo/echo/curl design. Hope she likes it!


Tuesday, October 27, 2015

Strolling through the garden

This wonderful applique piece did not get finished before the maker died unexpectedly. So a couple of her friends finished it and asked me to quilt it for the family. I was honored to do so.


First of all, a big shout out to longarm quilter, Susan Lawson, whose idea I borrowed. I have collected a few photos of applique quilts that do not have sashing, as I find it difficult to plan quilting for this situation. Creating diamonds in the intersections of the blocks and adding feather borders was a perfect solution. Thanks, fellow longarmer!


Then I filled in the blanks with various background designs and densities.


I discovered as I started this piece, that she lightly stuffed each applique piece. This gives them great dimension. Her color and fabric choices are just lovely. Sit back and stroll along her garden.


Thursday, October 22, 2015

Paradise in Blooms

I'm glad someone is willing to take on one of these fantastic Judy Niemeyer patterns. I'm sure that I could never piece one of these. I find it hard enough just to quilt them! I found several on google, although not too many pics that show the quilting. So, here are mine.


I may have gotten carried away with this one. I used eight different threads, including Aurifil invisible.


Texture! That's what you get on this one. Wool batting helps that a lot. You can leave triangle shapes open so that they fluff up wonderfully. Thanks also to dense fills.


Fun photo of the back shows the various thread colors. I did not want any thread to scream too loud on the front, so I chose to match thread colors as much as possible.


Whew! She's done and ready to go back to her owner.

Friday, October 9, 2015

Wooo Hooo!


It's been a long time coming. If you have followed this blog for any time, you have seen my Blue quilt in various stages of completion. Two and half years to design, piece and quilt this from my collection of blue and white fabrics. (When you quilt for customers for a living, there is precious time to work on your own things. So, I grabbed time where I could.)


It has paid off! I'm here with Tangled Up in Blue (thanks, Bob Dylan for that!) which is sporting Best In Show and Best Professional Quilting ribbons!

Best In Show – I never imagined that!

This is our regional show, the Rim Country Quilt Roundup. A show my husband and I started 11 years ago in central Arizona.

I could not be more proud...or giddy!


Monday, September 21, 2015

Ta Da Done!


Two and a half years after I started it, my blue and white medallion quilt is finally finished!


After discovering the Zentangle art form several years ago, I knew I wanted to use some of the designs as inspiration for quilting. And, that is what I have tried to do with my quilt. The next picture is of a tangle named Leaflet. It translated beautifully to continuous line quilting and looks, I think, quite smashing in the bright blue thread. (I used four colors of blue Glide thread over this quilt, in addition to Aurifil clear nylon for the stitch in the ditch.)


The odd shaped dark blue batik corner was a definite challenge. I sketched, stitched and ripped out designs for 2 whole days until I settled on this swash, inspired by the tangles Finery and FeatherFall. The actual FeatherFall also appears in the aqua triangle.


In the star's background fabric, I was inspired by the tangle Cockles and Mussels.


And, the center is based on a lotus mandala.


You do not know Zentangle? Google it or search for it on Pinterest. It is a relaxing way for anyone to draw beautiful designs, one stroke at a time!

Happy Doodling!


Wednesday, August 12, 2015

Last Row...


...and only a border to go!

While the two sleigh blocks are my favorites because of their detail, this Hawaiian-style cut of the Holy Family is so special. Isn't it beautiful in its simplicity?


And, who wouldn't love poinsettias in a Bean Pot?!!!


And, Christmas Cactus. (I killed three of them last year! There must be a secret to growing them...)


I especially like the way the red Bells just pop, due to the dense stipple in the background. (I shot this at an angle to show its 3-D effect.)


I've thoroughly enjoyed this piece and kind of don't want it to end. Kidding! I'm ready to be done and on to something else. Double Wedding Ring, anyone?


A Merry (albeit early) Christmas blessing to you all!

Monday, August 10, 2015

Blocks 9 – 12


People have complimented me on my photos for this blog. The quality of inexpensive cameras today really helps. But, the best aspect of my photography is lighting. And, I take no credit for that. You see, my studio has a big picture window just to the left of my longarm frame. It's a northern exposure, so no sun comes in that window, but tons of light, which creates the shadows that highlight the quilt line.

The reason I mention this, is that sometimes, great texture shows in the studio, and therefore in the quilt photos, only to have that texture disappear when the quilt is hung in a show or on the wall of your house. This has been a great frustration to me. And, one that I try to keep in mind when I plan quilting. Am I spending too much time creating complex quilt motifs that will never been seen? I'm afraid I have in the past.

Hopefully, that will not be the case of the Christmas in Baltimore quilt...but it is still a possibility. With that in mind, here are Blocks 9 through 12.


Tuesday, August 4, 2015

Blocks 5 – 8


So, here we are again with Row 2.


Block 5 has lots of space, so I filled it up with paisleys. Sweet.


Block 6 also has space, so we have pebbles with occasional shells.


Block 7 – Oooh, I'm so happy with how this turned out. After outlining the interior petals and leaf spaces, I was at a loss as how to quilt the background because there are still a lot of teeny spaces formed by the leaves along the edge of the design. It just popped into my head to echo those shapes a couple of times. Then what? Keep going! The echos fill the space out to the boundary. So cool.


Block 8 is a little more open than the reindeer was, so I have added little feathers to the continuous curl design.


I've got some non-quilty commitments during the rest of this week, so progress on Row 3 will be slower. See you when I get it finished!